Today,I dont have much time I get home from work at 6 in the morning after leaving 4 in the afternoon the day before,Then I have to leave at 3 this evening,barely enough time to lay down so not much gardening on saturdays,
Tomorrow I will finish the Composter,hopefully...
Saturday, April 2, 2011
Friday, April 1, 2011
Yellow
It seems Yellow is the first color of Spring to show upIn my Garden but its all good,I will certainly take it..
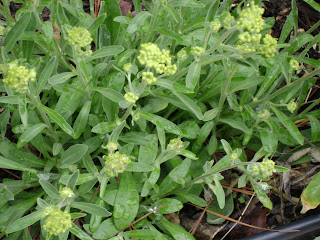
GoldDust Allysum(perennial)
'Ive said this once before but I will say it again,I think today is the last day of Winter....
Forsythia,of which I took cuttings from
Mother'sGarden
Green and Cream,Hosta just starting to emerge
The 7 day forecast looked promising,I even saw an 80 something day in there,now thats hope...
I'm almost ready
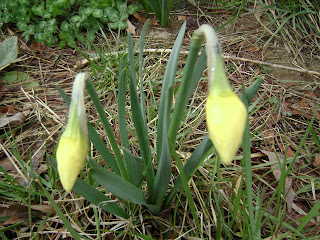
This is something I hav'nt seen before but I've read about the stem mutated and produced a triple bloom on the daffodil
Labels:
Yellow
Thursday, March 31, 2011
Tumbling Composter
Its cold and drizzly today but I did manage to do a little something after working last nite...
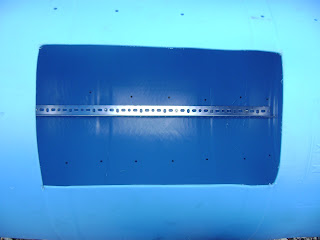
I started out using a 55 gal plastic drum.A good place to obtain these drums is to call your local car washes,thats how I got mine,it was free always better..Be sure and clean the inside out really well...I cleaned the inside after I cut my door..Thats the 1st step I did was to cut the door,I used a jigsaw and layed it out with a square and pencil...
Next step-- I drilled holes all in the container for ventilation and drainage
3rd step-- I cut the holes in the ends.I found the center and I already knew I was going to use a 2 in pipe so I just made my holes two inches,you can use a soup can or coffee cup what ever is close to 2 inches and draw your circle then cut it out.I used a jigsaw for this also..
4th step-- I added a piece of angle iron to the inside that I bought at the hardware store,this was for a counterbalance and also if youve seen the inside of a washer or dryer,there will be fins for lack of better word to help with tumbling..When I say counterbalance,I put it opposite the door,that way more weight will be at the bottom making the door always on top..
5th step-- I bought 4 toilet flanges and then I put one on each side of the holes on the ends and bolted them together,this makes like a bearing for the drum to spin on ..Two on the inside and two on the outside..
6th step-- I added the door back onto the drum,using the same piece I previously cut out..I attached it with two hinges and a latch
7th step I added a piece of pipe for the drum to spin on ..
Next I will build a frame for all this to sit on,I want to keep in mind to have it high enough off the ground to place a wheelbarrow under..Im thinking two 4x4s in the ground with holes for the pipe to run through then a handle on the drum in order to spin it...something simple...this last pic.is just to give you an idea of the size of this beast..should be able to make a lot of compost in this and the price is very very good on it..I checked the prices at stores and I couldnt justify it,I thought to myself why pay 150.00 when I can build it for 10.00..And the 30 gal. one that I got for free at another carwash that one will be for compost tea,more to come on that later....
And here it is Finished
Join us at Seed Traders If you like to trade seed for heirloom veggies,flowers,shrubs and Tree's
Labels:
Tumbling Composter
Wednesday, March 30, 2011
Tuesday, March 29, 2011
Doesnt matter where you are planted,make the best of it and bloom beautifully.
The simple pleasures of life the morning coffee and newspaper
Today Im gonna sow some Tomato seeds,heres the list
MortgageLifter
cherokeePurple
Rutgers
RedBrandywine
BlackBrandywine
PaulRobeson
GiantBelgium
This will also be a lil tutorial in wintersowing but now its spring so it will be springsowing
first put holes in bottom of the container
next cut the container in half
add your growing medium and wet the medium till its the consistency of brownie mix and add seeds
label and add the tops back on and put outside thats it thats all..
Here is one I did 2 weeks ago that has a tom growing now..
Monday, March 28, 2011
March 28th Monday
This will be a record of things growing and projects to be done in and around the home..,and a lesson in blogging for me...
Subscribe to:
Comments (Atom)


